
A short guide to everything the studio can do. Take it at your own pace — nothing here is complicated, and nothing you do can be lost by pressing a wrong button.
Nothing here matches that word. Try a different one, or clear the search to see the whole guide.
What this app is
Misophonia Warriors Studio lets you take a video containing sounds you find hard to hear and swap the visual or audio part with another you choose. You work at your own speed, with your therapist guiding the way. Everything happens on your own device — nothing you load or record is ever uploaded anywhere.
It can also do two things that are easy to miss:
- Record your own sounds. You can record straight into the app with your microphone, or upload sound files you already have, and keep them in your own library to use in any video.
- Lift a sound out of one video and use it in another. If a video contains a sound you want to work with, you can save that moment to your library and then plant it into a different video.
Setting up the video for a reprocessing exercise
There are two common ways to set up an exercise, and the studio does both. Your therapist will tell you which one fits where you are.
Placing a hard sound in a new, more pleasant video
The trigger sound stays, but it plays inside a video you actually enjoy.
- Load the pleasant video — drop it onto the big dashed box, click the box to choose one, or pick one from the Library.
- Mark where the sound should go. If the video has talking in it, switch Find sounds to Speaking and the studio will find the spoken parts for you — or simply drag on the sound picture.
- Choose the sound to plant — from the Triggers shelf, or one of your own from My sounds.
- Save — press Save my new video and the finished video lands in your Downloads folder.
The studio automatically matches every planted sound to the video's own loudness, so nothing ever jumps out at you.
Softening the original video
The other way around: keep the video, and swap the hard sounds in it for ones you choose. Four steps — the same four steps shown across the top of the studio.
- Add your video. Drop a video onto the big dashed box, or click it to choose one. You can also pick a practice video from the Library.
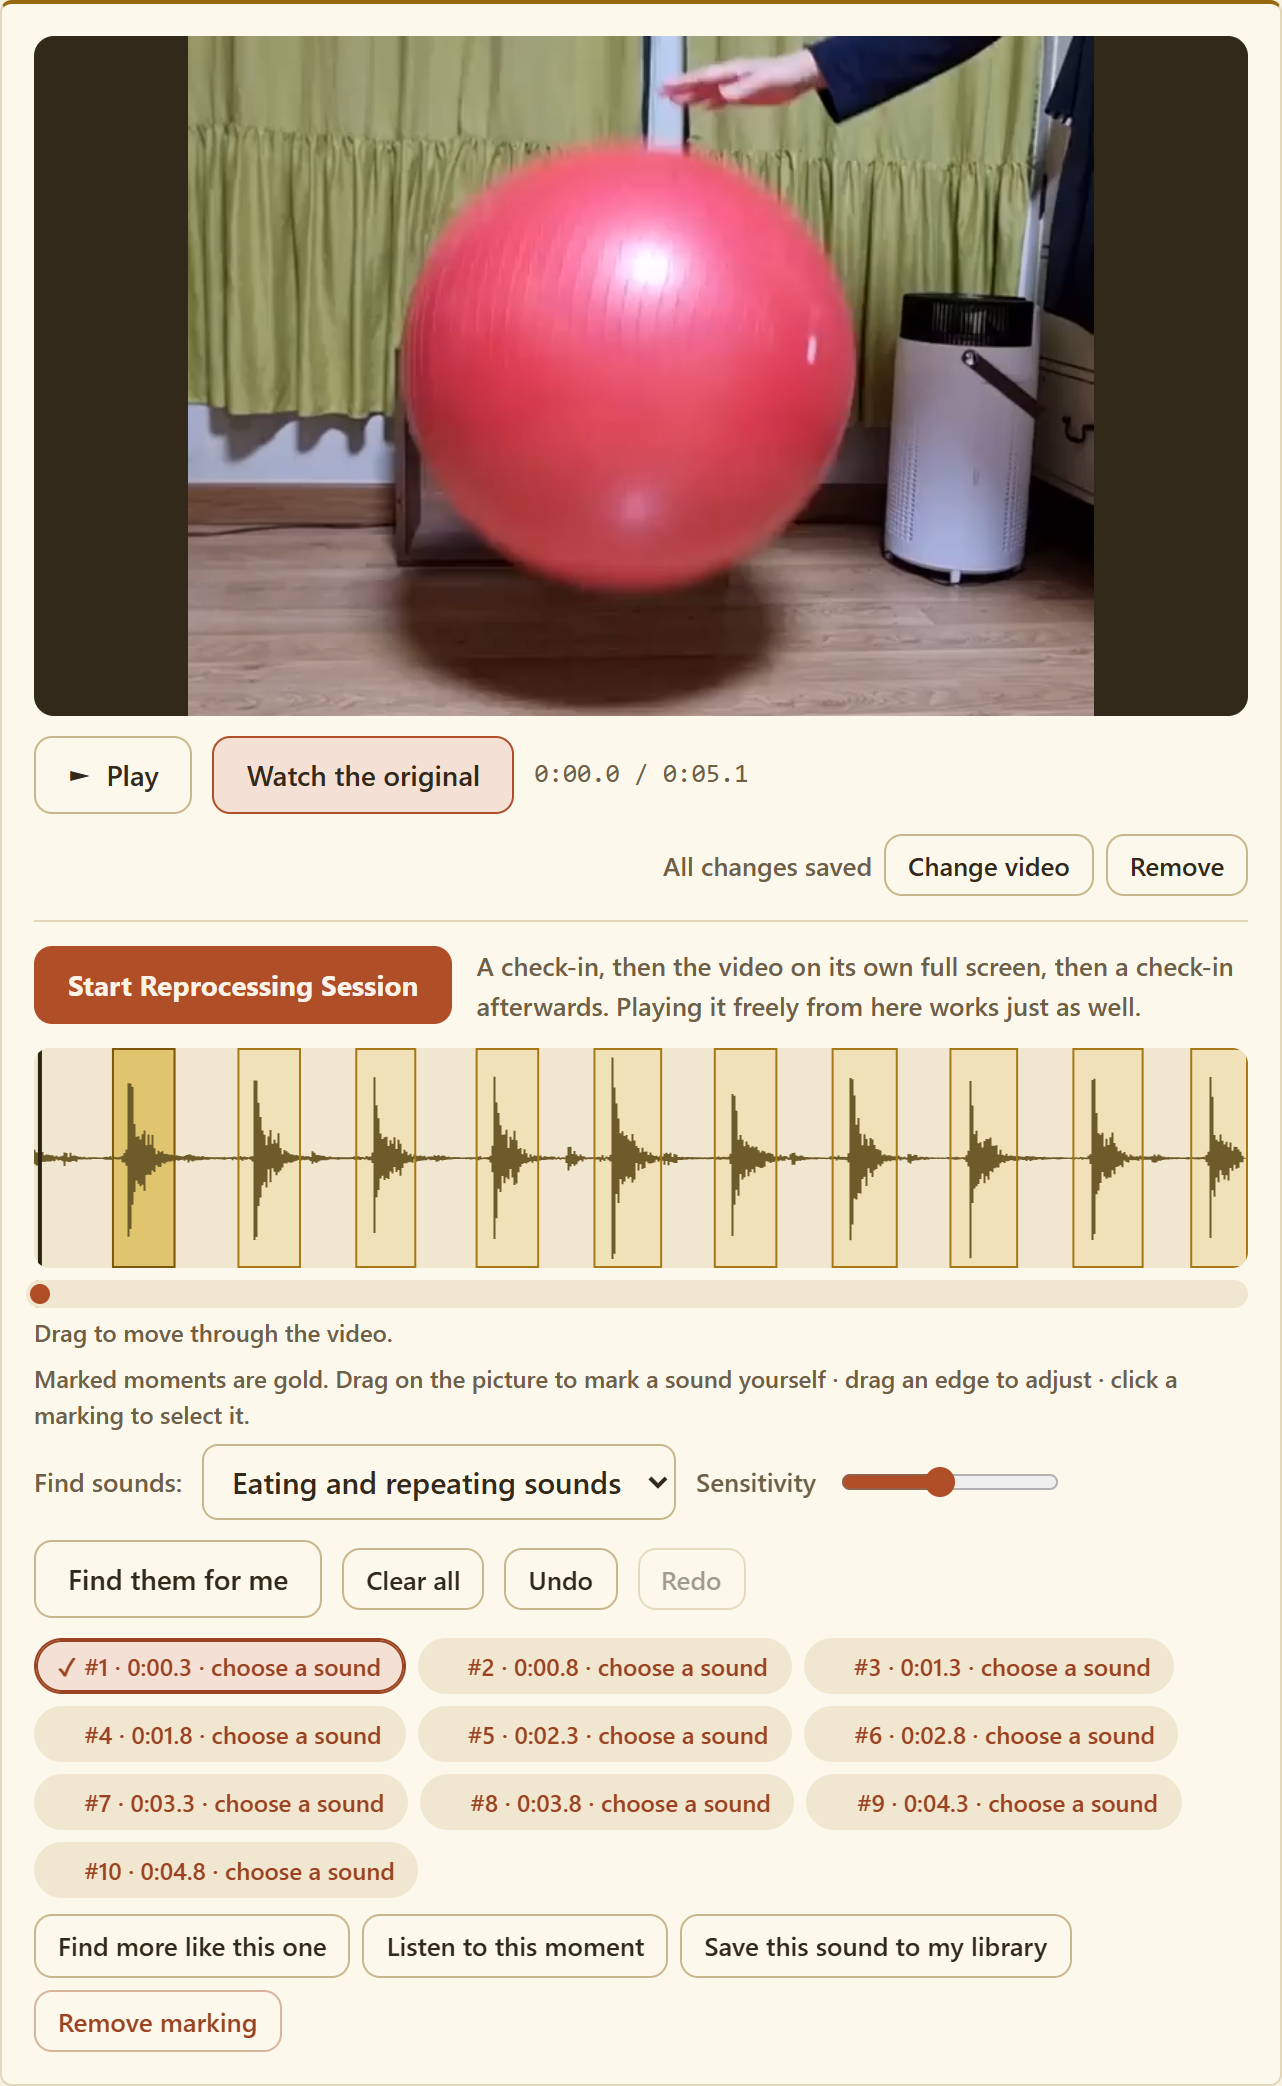
- Mark the sounds. Press Find them for me and the studio listens through the video and marks the trigger moments in gold. You can also drag on the sound picture to mark a moment yourself, drag an edge to adjust one, or click a marking to select it.
The slim bar under the sound picture moves you through the video — drag it to any moment. It pauses the video while you do, so you can find your place before pressing Play.
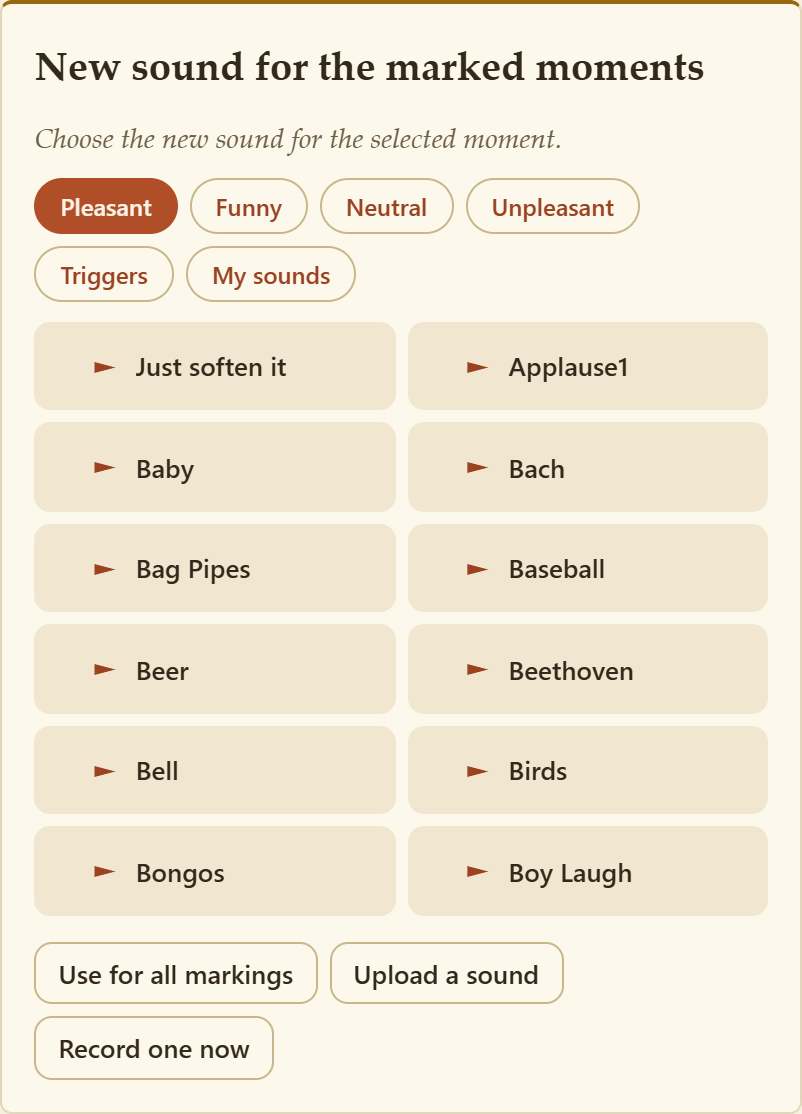
If you drag a marking across another one, the two join into a single marking and the studio says "Joined into one marking." That's intended — one moment only ever needs one marking. - Choose new sounds. Pick a sound from the shelves — Pleasant, Funny, Neutral, or one of your own. Click a marking first to give it its own sound, or use Use for all markings to set one sound everywhere.
- Save your video. Press Save my new video. The finished video lands in your Downloads folder, like any other download.

Taking a sound out of any video
Any moment you have marked can become a sound of its own, to reuse anywhere.
- Click the marking to select it.
- Press Save this sound to my library.
- That's it — the sound now lives in My sounds, permanently, and appears on the My sounds shelf whenever you choose sounds.

Recording or uploading your own sounds
Open My sounds in the top menu.
- Record: press Start recording, make the sound, stop, then trim the part you want to keep and give it a name. The microphone is only used while you record.
- Upload: in the studio's sound picker, Upload a sound takes any audio file from your device.
Your sounds stay on this device only. They are never uploaded.

The Library
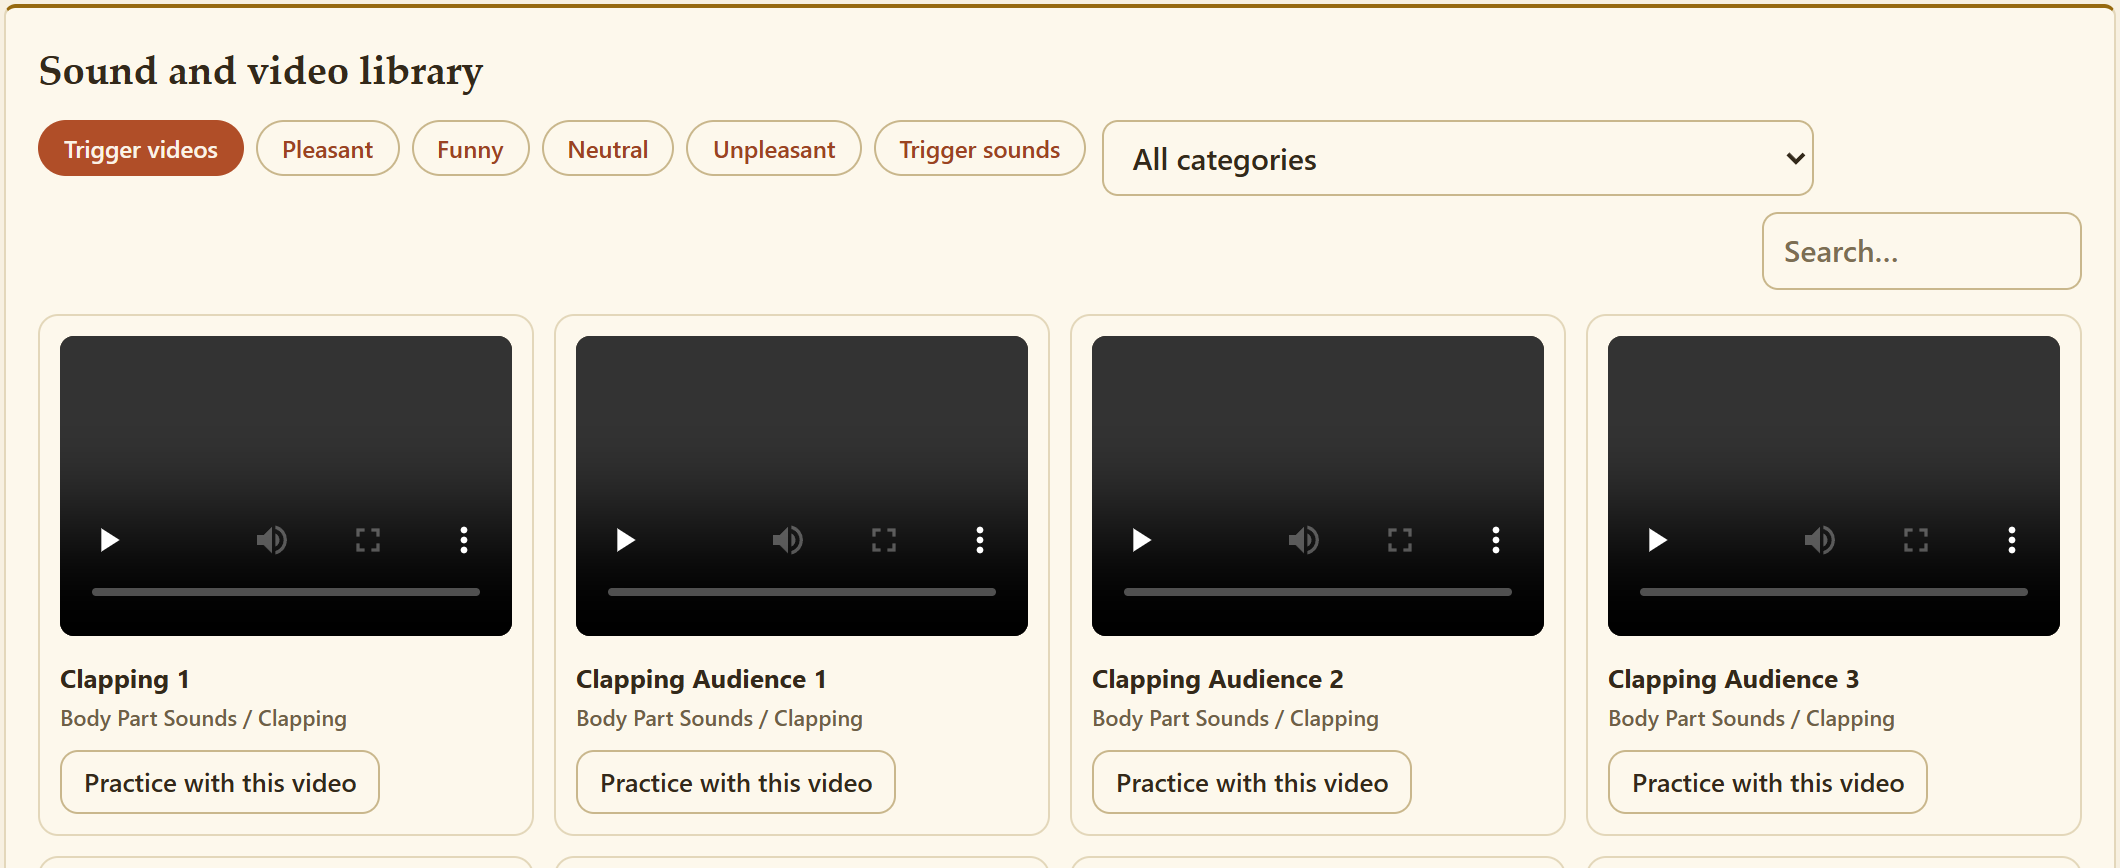
The Library tab at the top of the page holds more than a thousand practice trigger videos, plus all the sound shelves, ready to browse.
- Trigger videos are organized by category — eating sounds, nasal and throat sounds, tapping, and more. Use the category menu to narrow the list, or type in the search box to find something specific.
- Press Practice with this video on any card and it opens straight into the studio, ready to mark.
- The other tabs — Pleasant, Funny, Neutral, Unpleasant and Trigger sounds — let you listen through the sound shelves outside the studio, whenever you like.
If your therapist says "practice with a trigger video this week", this is where to find one.
Practice mode
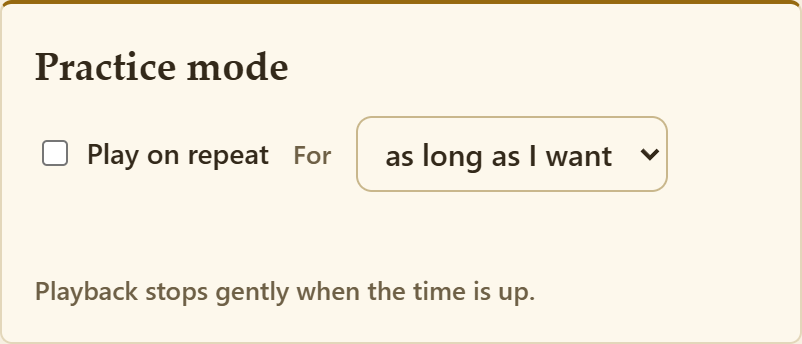
Tick Play on repeat and choose a length, and the video plays over and over until the time is up, then stops gently. Pausing the video pauses the countdown too — answering the door doesn't cost you practice time.
Reprocessing sessions
A reprocessing session is a practice run you keep a record of. It is the same video and the same sounds you have already set up — the difference is that the studio asks you a couple of short questions before and after, and remembers what you said, so you and your therapist can look back at how things are changing.
Press Start Reprocessing Session, just under the play controls. You go through three parts.
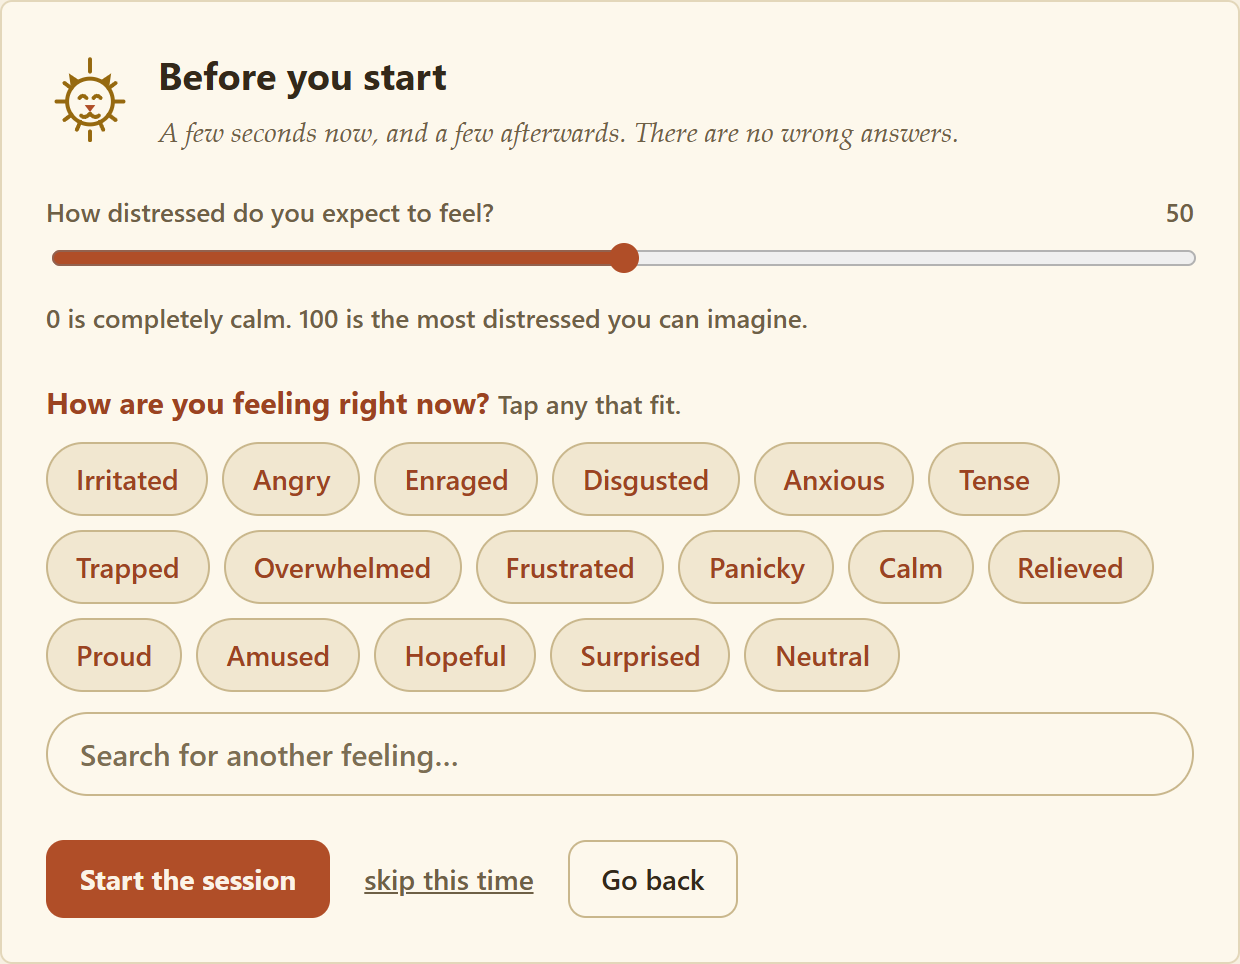
- A check-in first. One slider: how distressed do you expect to feel? Then, you can label some feelings. Nothing here is a test, and there are no wrong answers.
- The video, on its own. The rest of the screen goes dark and the video fills it, so there is nothing to look at but the thing you came to practice. Tap anywhere on the video to pause or continue. Finish ends the session whenever you want, and so does the Esc key. If you set a practice length, the clock counts down; if not, it counts up.
- A check-in afterwards. You will see two sliders: how distressed were you at its worst? and how did you feel at the end? Then you can also choose to label emotions. You will also see a box where you can type text describing anything that surprised you about this session.
You may skip any question. If you leave a slider untouched, you will see a balloon prompt saying, “you left this at 50, is that about right?”. You can continue, press Skip, or adjust the slider.
If you close the tab in the middle of a session, nothing is lost: the session is saved but marked unfinished.

My progress
My progress collects every reprocessing session you have finished: when it was, which video, what you answered, how long you practiced, and anything you wrote. It is on this device only, like everything else.
How each session felt
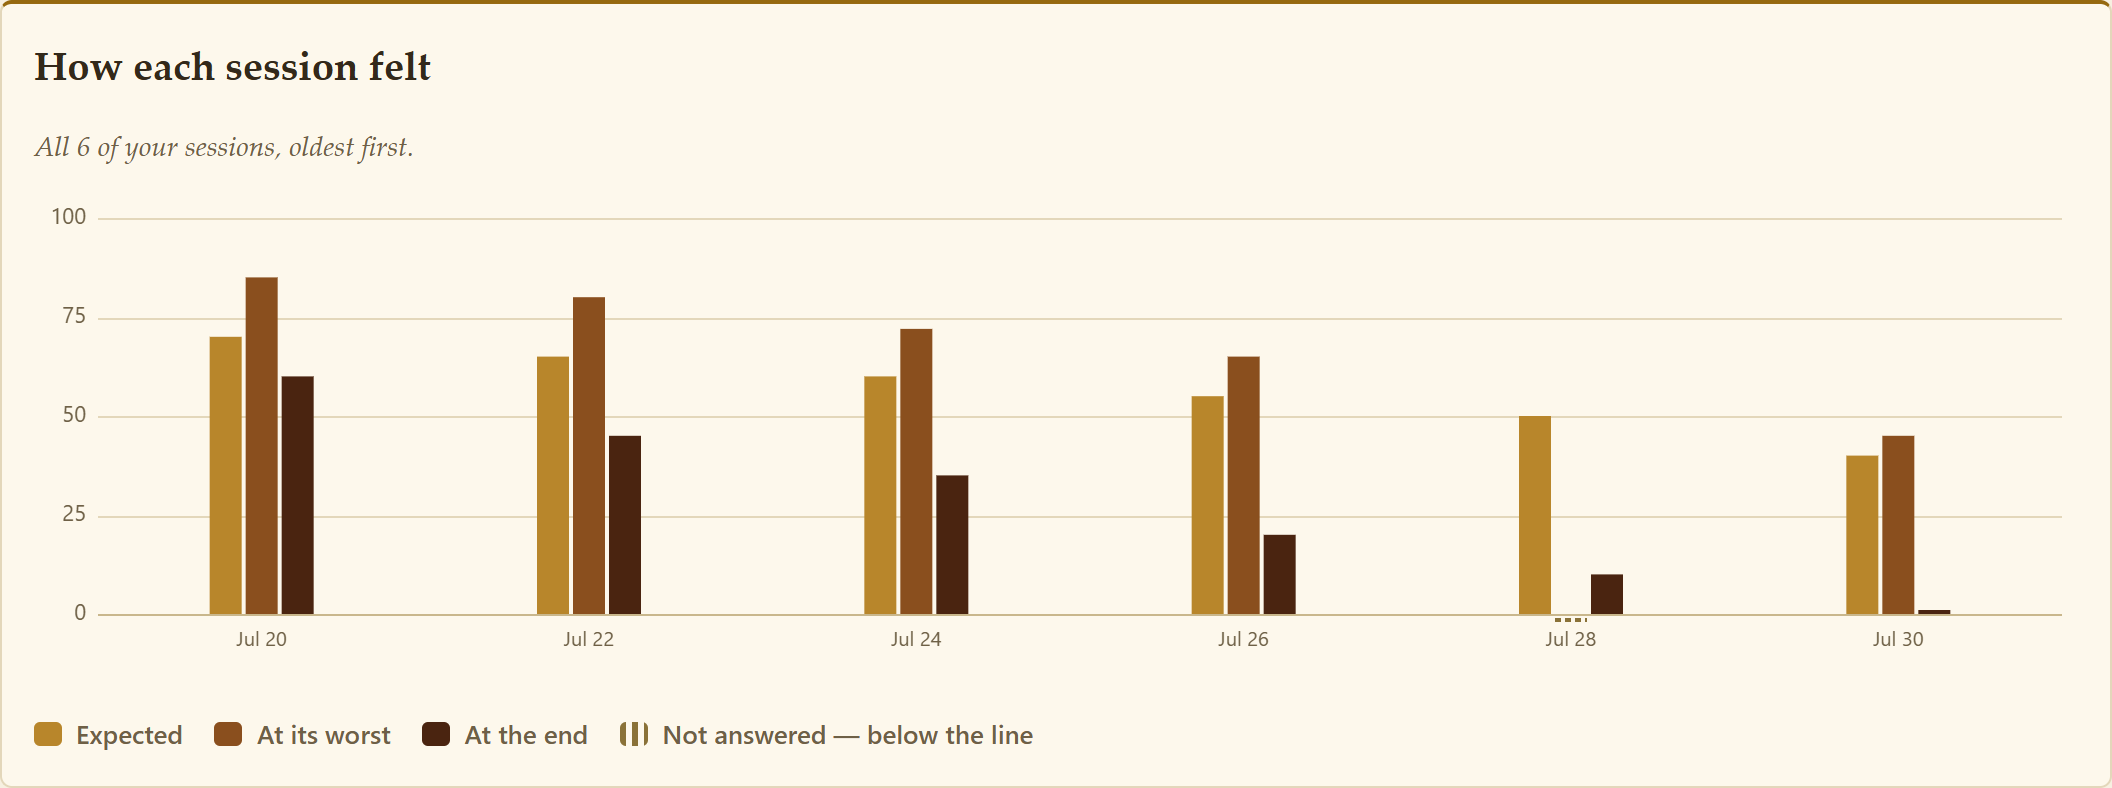
The first chart shows three bars per session: what you expected, how it was at its worst, and how you felt at the end. Many people find the at-the-end bar comes down before the other two do — that is often the first sign of things shifting.
Reaching 0 is a real result, and the chart says so. A genuine 0 — you were not distressed at all — is drawn as a small solid sliver sitting above the line, exactly like any other answer, just a very low one. A question you skipped is drawn as a dashed mark hanging below the line instead. Nothing except a skipped answer is ever drawn below the line, so a 0 you worked hard for can never be mistaken for a blank.
Over time
The second chart draws at-its-worst and at-the-end as lines across all your sessions, with the blend level underneath as a dashed line. The blend matters for reading the rest: a session at a harder blend setting is not the same test as an easier one, so the two lines are meant to be read against it rather than on their own. Where a question was skipped the line simply has a gap — it is never joined across a missing answer.
Sharing with your therapist
At the top of My progress there is a panel called Share with my therapist. It makes one file containing both charts, every session, your feelings and your notes, and puts it in your Downloads folder. Then it opens a page where you can drop that file to send it.
Nothing leaves this device unless you choose to send it. Pressing the button only makes a file and saves it to your own computer. The sending is a separate, deliberate step: you drag the file onto the upload page yourself. If you change your mind, delete the file and nothing has gone anywhere.
A few things worth knowing:
- You do not need a Dropbox account, and you will not be asked to make one. The page is a drop box your therapist set up; only they can see what lands in it.
- The file contains your sessions — the numbers, the feelings, the notes, the video file names and the dates. It does not contain your videos, your recordings, or your name. The app never asks for your name, and the report says so, so its absence cannot be mistaken for something missing.
- It is made fresh each time you press the button, from what is stored right now.
- If your browser blocks the upload page from opening, the studio says so and gives you a button to open it yourself.

Making it comfortable to read
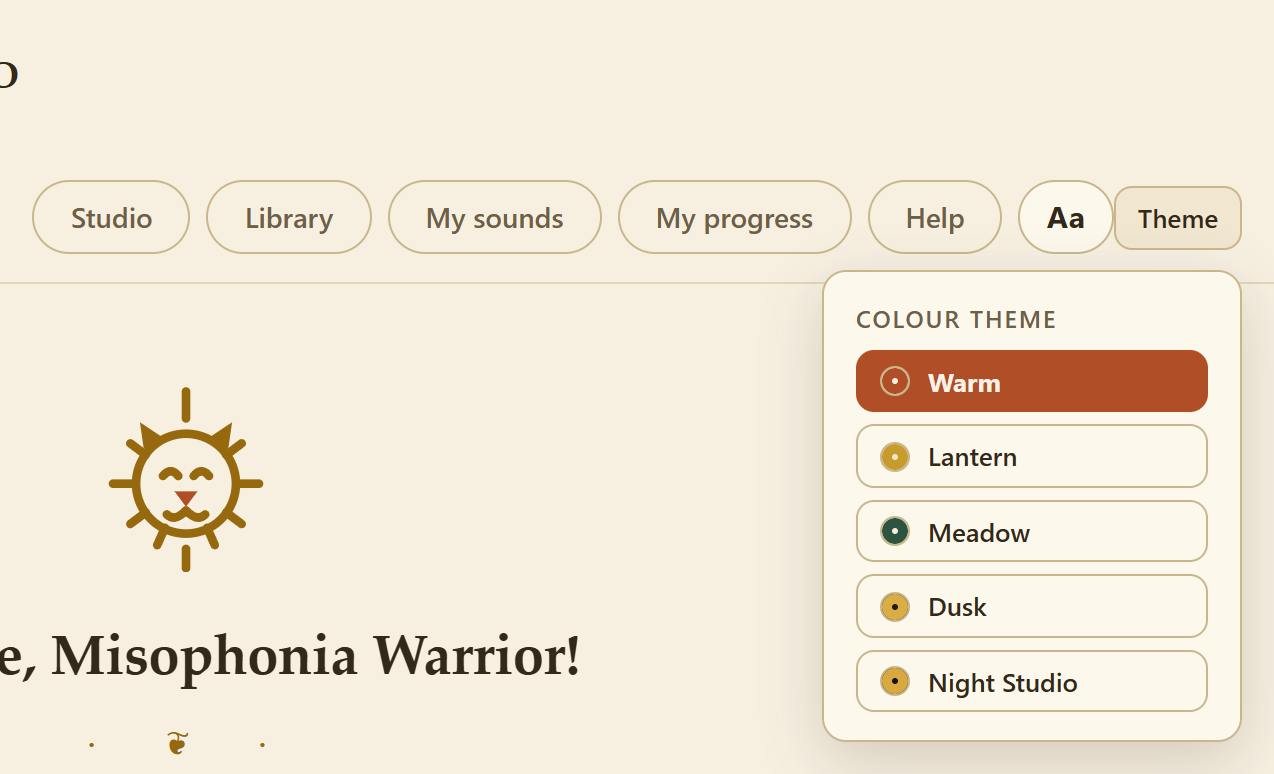
Two small buttons sit at the top right of every screen, next to the menu.
Aa — text size and weight
Aa makes everything larger — normal, larger, or largest — and can set the text bolder. The menu stays open while you adjust, so you can press Larger twice and then Bold without reopening it. Press Esc, or click anywhere else, to close it.
Theme — the colors
Theme offers five looks: Warm (the usual one), Lantern, Meadow, and two dark ones for evening practice, Dusk and Night Studio. Choosing one applies it straight away and closes the menu.
Both settings belong to this device rather than to your work, so they are deliberately not part of a backup — restoring onto a new computer never brings someone else’s reading settings with it. Anything you print, and anything you send your therapist, always comes out in Warm, so it looks the same on their machine as it did on yours.
Help
Help in the menu opens this guide in its own tab, so you never lose your place in the studio. Back to the studio closes this tab again and returns you to exactly where you were.
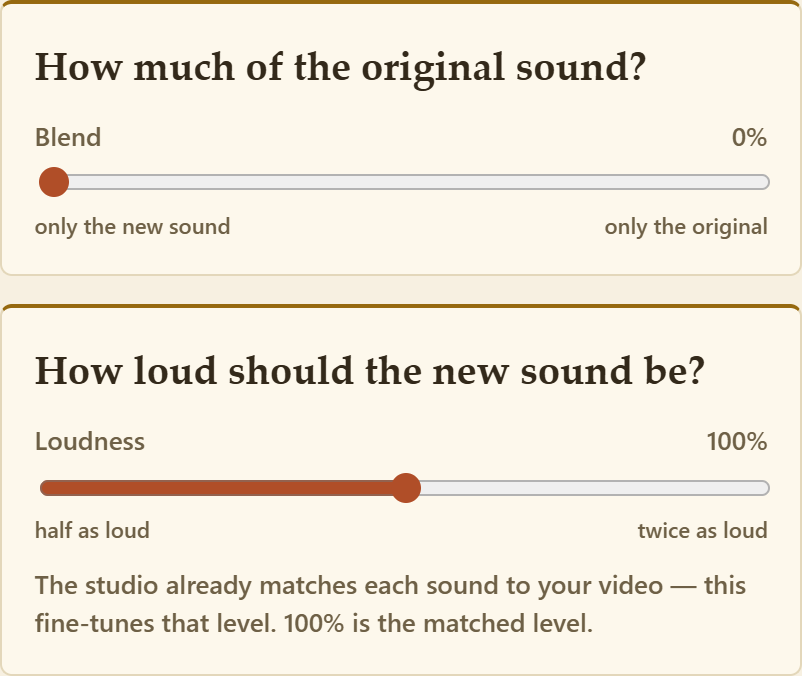
The two sliders
How much of the original sound?
The Blend slider controls how much of the video's original sound you hear inside the marked moments. At one end you hear only the new sound; at the other, only the original. Your therapist will guide you on how to use it.
How loud should the new sound be?
The studio automatically matches every planted sound to your video's loudness. The Loudness slider fine-tunes that level, from half as loud to twice as loud — 100% is the matched level. Whatever you set is remembered for this video. Your therapist will guide you here too.
Back up and restore
In My sounds, the panel called Keep a copy of your work has two buttons:
- Back up everything saves one file holding all your recorded sounds and every video's markings and settings. Keep it somewhere safe — it downloads like any file.
- Restore from a backup brings it all back. Restoring only ever adds — it never deletes or replaces anything already on the device, so restoring twice is harmless.
When to back up: before clearing your browser's history or data, when moving to a new computer, and every now and then just in case.

Frequently Asked Questions
- Do I need an internet connection?
-
For some of it, yes. This was tested rather than guessed, with the connection switched off part-way through.
Works with no connection at all — anything that lives on your own device:
- Your own videos, your markings, your recordings and your saved sessions all open normally.
- A video that is already open keeps playing if your connection drops in the middle of a session. You will not be interrupted part-way through.
- Making the report for your therapist. It is built on your device out of what is already stored. (Without a connection it comes out without the logo at the top — the report itself is complete.)
Needs a connection:
- Opening or refreshing the page. The app is a web page, so the first load of the day needs to reach the site. Once it is open you can keep working if the connection drops.
- Videos from the Library and sounds from the shelves. These are stored on the site, not on your device, so they are fetched when you first use them. Ones you have used before will often still play, because your browser keeps a copy — but that is your browser being helpful, not a promise.
- Saving your new video. The part that does the converting is downloaded the first time you use it.
- Sending the report to your therapist. The report is made on your device, but the page you drop it onto is a website. You can make the report offline, keep the file, and send it later.
If you know you will be somewhere without a connection, open the app while you still have one and leave the tab open.
- I opened my video again and my markings are gone.
- Your markings are still saved — but you must open the same file. Renaming a video or downloading it again makes it look like a brand-new video to the studio. Open the original file and your markings come straight back.
- Where did my saved video go?
- Your Downloads folder, like any other download. It's named after the original, with "- new sounds" added.
- Are my videos uploaded anywhere?
- No. Never. Everything happens on your device, and nothing you load or record leaves it.
- I cleared my browser history and my sounds are gone.
- Your sounds and markings live in the browser's own storage, so clearing "site data" clears them too. This is exactly what Back up everything protects against — restore your backup and it all comes back.
- Can I use this on my phone or iPad?
- Yes — the same link works there. On an iPad we recommend using Share → Add to Home Screen: the studio then opens like an app, and it also gives your saved work extra protection.
- A sound says it couldn't load.
- That's a connection hiccup. Your choice is remembered — once you're online again, it will load normally.
- Does private / incognito mode work?
- It works, but nothing is saved once the window closes — markings and sounds vanish with it. Use a normal window.
- Why does it ask to use my microphone?
- Only for recording your own sounds, and only while you record — your browser shows an indicator the whole time the microphone is on. The studio never listens otherwise.